Glammed Up Lil Blue Boo

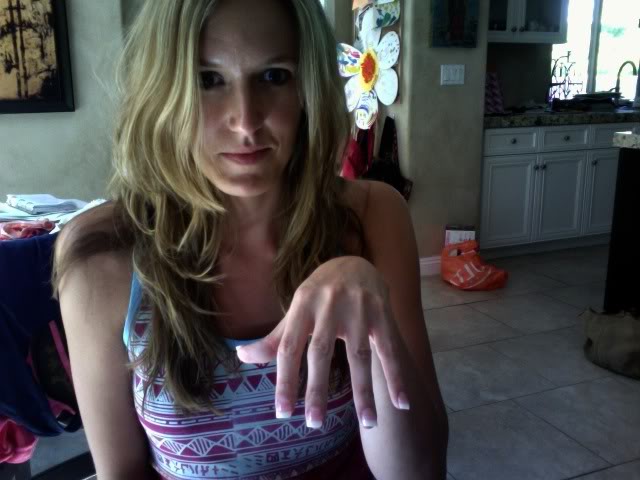
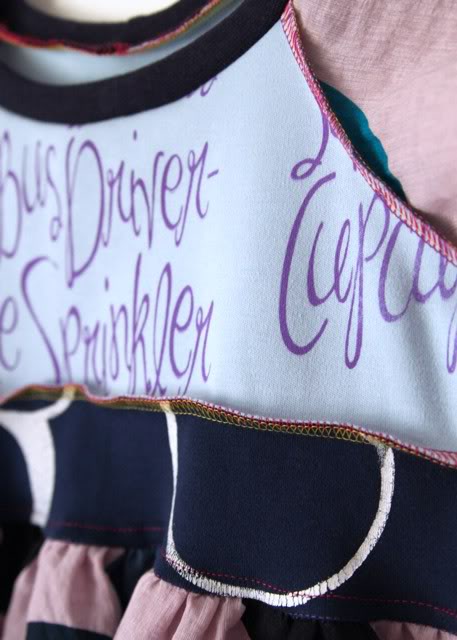
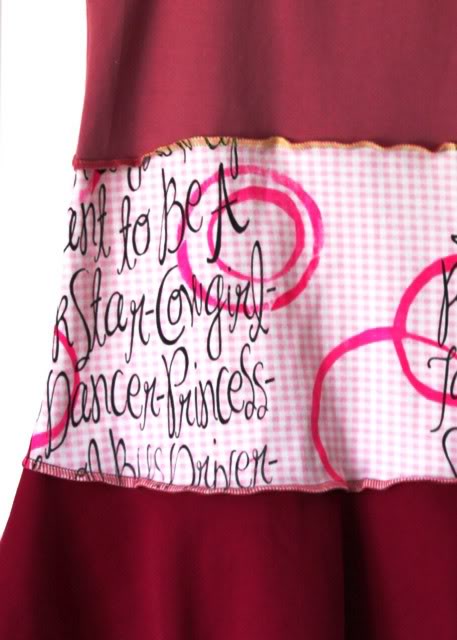
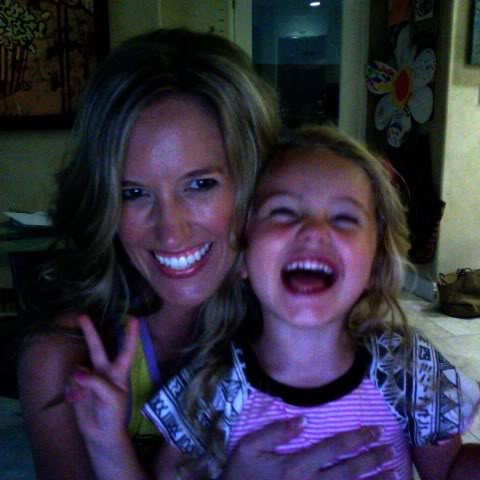
We had our Lil Blue Boo photo shoot yesterday….to be revealed in a few weeks! Both Boo and I were “glammed” up by the best stylist in the world….Tara Correnti. We shot in 106 degree heat. It was SO hot….but so fun. Taili Song Roth was the photographer. Her work is AMAZING and I can’t wait to see the final photos! Boo and I couldn’t resist the Mac Photo Booth last night after the shoot ended:


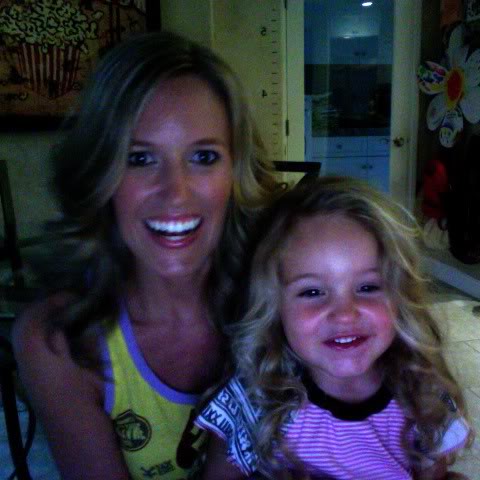
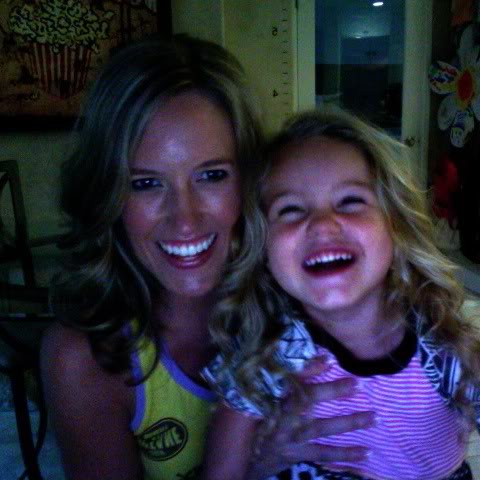
After I took a shower and washed all the makeup off and curl out….Sienna cried that she wanted my curly hair back. Hmm…..maybe I should curl my hair before picking her up from school today?! It’s so easy to make her happy.

A BooMoose

I love collaborations because they are a chance to create something new by combining my interests with someone else’s. Recently I teamed up with Melanie of The Melamoose Co to create some adorable little doll clothes to fit 15-16″ Waldorf style dolls (Bamboletta, Dragonfly’s Hollow, Apple Tree House etc.) I silk screened some itty bitty little lady bug onto knit yardage and sent it Mel’s way and here is what she turned it into! Introducing….the “BooMoose” collection:


She made an entire mini collection of BooMeese! You can check out preview pics of the other creations on The Melamoose Co Facebook page. They will be listed in her Etsy shop on Thursday, July 1st at 9pm EST. Her little tiny creations sell out in seconds so be on time!

I’ve been having so much fun with my other current collaboration with Stephanie Corfee. Here are just a few of the creations I’ve made with her “When I Grow Up” print:


And since I’ve been working on adding more and more “Big” Blue Boo clothing to my shop (Junior/Women’s sizes), here is Stephanie’s vision for a maxi-length dress using another one of her prints! It’s in the works! I’m working on a detailed tutorial for how I plan to silk screen the bottom portion of the dress.

It’s been a busy few weeks at Lil Blue Boo! Today Boo and I have a photo shoot together (it’s still a secret). I’ve got my air dried “beachy” hair ready and got my fingernails done (they were a little purple from some recent dyeing). Oh yes, I’m wearing a “Geek Batik” printed Lil Blue Boo tunic……


If you are new to Lil Blue Boo, check out some of my screen printing tutorials!

Screen Printing 101

Screen Printing with Contact Paper

Screenprinted Drapes and Pillows

Stephanie Corfee for Lil Blue Boo!

Here are some sneak peeks of a brand new Lil Blue Boo collaboration with artist Stephanie Corfee! Stephanie emailed me a few weeks ago out of the blue and the second I saw her artwork I was hooked. Stephanie’s blog title describes her work perfectly: vibrant, bohemian, intricate. Her detailed works are amazing!


After a few emails back and forth, all I could think about was how similar we were and that I wanted to work with her on something! I kept thinking about how great her work would look on fabric. When I asked Stephanie if she would be interested in a collaboration she said yes! She even had the perfect typography print that she had been working on……When I Grow Up:

The coloring for her print comes from another one of her original works: Baby Bohemia Stephanie writes more about her print on her blog.


I love the idea of giving a silk screened piece of clothing combined with the original art print for a gift!


The past week, I’ve been working on several different fabric and ink combos using Stephanie’s print…..


…..as well as incorporating some vintage linens.


Here are a few sneak peeks of the new mini collection:


I’m so excited to be working with Stephanie! We are already talking about the next project! Look for the “When I Grow Up” limited editions in my Lil Blue Boo shop starting tomorrow! As usual, new items will be added daily until the print is discontinued.

Personalized Hardboard Nursery Art (A Tutorial)


This tutorial is part of luvinthemommyhood’s baby bonanza! Go over and check out her blog and read my baby story when you get a chance! If you haven’t checked out all the awesome posts from the last few weeks you are missing out! Thank you so much Shannon for including me in the “baby” lineup!


While I don’t have a tiny baby of my own anymore, I still have the opportunity to make things for my baby nieces, nephews and my friend’s babies.


I love making elaborately layered personalized nursery art pieces…..unique to each child.


The secret is the layering of paint, buttons, brads……


…stitching, tiny bows, decoupage, stamping….


….resulting in a truly unique piece of art for a special little one!


I always start out with a ready made (and matted) frame. Custom framing can be ridiculously expensive…I once asked a store to custom cut a mat for me (JUST the mat)…and they quoted me $90! So I decided to start making my little paintings to fit frames that I could buy right off the shelf!


You’ll want to use a hardboard or Gessoboard (gesso means it is pre-primed) for your painting. It won’t warp and it doesn’t have sap or woodgrain. It is also thin enough to frame under glass. You can buy it in several sizes. For the 6×8″ frame shown above I would typically use a 5×7″ piece of Gessoboard. You want there to be a small gap between your mat and painting because the painting will be “float” float framed in the middle.


For the frame I use in this example (5×7″), I had to custom cut my board to 4×6″ so it would fit.

Photobucket

Cutting a custom hardboard piece:

I use larger hardboard pieces so that I can cut several pieces out and reduce waste. First, I measure the 4×6″ shape out:


Then I attach a metal ruler using small C clamps:


I use a hand skill saw……


……to carefully cut against the ruler:


Then I use a sandpaper block to fix any edges:


Starting the design:

I started with my piece of Gessoboard. This is pre-primed…..if you are just using plain hardboard then you’ll need to prime it with Gesso first. You can even add some paint to your Gesso for your background color.


I painted my background with acrylic craft paint (mixing a little Gesso in with my paint to make it more opaque for less coats):

Photobucket
The easiest way to draw a design is to print out the name and use graphite transfer paper to transfer it onto the board:

Photobucket
I use a piece of tracing paper to draw in my other designs……

Photobucket
…..and then transfer them with graphite transfer paper too.

Photobucket

Painting and decorating the piece:

First I block in the colors…

Photobucket
…..these don’t have to be perfect because I’ll be outlining and adding to them:

Photobucket
I outline all my letters and designs using a black paint pen.

Photobucket
This is the best paint pen I’ve found: the Zig Painty Twin…it writes very smoothly….as if I was hand painting each detailed letter:

A little trick: Once your paint pen tip starts to become rough and at its end, pull it out and stick it in the other way….you’ll get paint all over your fingers, but you’ll have a new pen!

Photobucket
To make the entire design more cohesive I take a decorative stencil…….

Photobucket
…….and draw it into the background in several places. Then I outline it with black paint pen too.

Photobucket
I add in “faux painted” stitching around many of the designs and letters:

Photobucket
I begin to decorate each of the letters slightly different….here I added some white dots to mimic stars and constellations:

Photobucket
I love adding sparkle paint to some of the letters and images:


Here is what the painting looks like at this stage:

Photobucket
Before adding my three dimensional details, I apply a glossy acrylic varnish coat to the painting:

Photobucket

Adding three dimensional details:

To add buttons, stitching and brads I use a tiny drill bit with a regular household drill. (I use either a 3/64″ or a 1/16″…..just make sure your needle will fit through the hole.) You might want to take your drill to the hardware store with you when buying the bits….some cheaper household drills can’t grip the small bit tightly.

Photobucket
I set the painting on top of a box top (from a pack of sodas or a file box) so that I don’t drill into my table…..and drill each tiny hole that I need:

Photobucket
I use metallic or regular DMC thread to sew around letters or to attach buttons…..

Photobucket
….and tie them off tightly in the back.

Photobucket
Adding these tiny details completes the painting!

Photobucket

Float framing your final piece:

I take apart my frame and add a decorative piece of paper to the cardboard backing using double sided tape:

Photobucket
I add adhesive spacers to the back of the mat so that it will be raised slightly from the backing (you can find these in your scrapbooking section of your craft store):

Photobucket
I use a heavy duty double stick tape on the back of the hard board…..

Photobucket
…..and place it directly in the center of the mat.

Photobucket
The reassembled frame and finished piece!

Photobucket
Perfect for a nursery wall or a shelf!

Photobucket
Variations:

You can decorate a plain white backing behind the painting with stripes:


….or checks:


Decorate a plain outer frame with hand painted polka dots……


…..or use tiny cork stamps to stamp a design….


…..or a stencil to paint flourishes:


A gift they’ll treasure forever!

Visit this tutorial for more layering techniques:

Oh the places they go!

Boo loves working on her wooden U.S. map puzzle every morning when she wakes up. She’s starting to associate the states with where family members live and what each state is known for. I think her geography skills are better than mine already. I’m embarrassed to say I don’t even know all of the state capitals. I thought it would be fun to start mapping out where my handmade upcycled dresses have ended up. I asked for locations on my Facebook page and for each new city I added a little miniature upcycled dress. So here it is….around the world with Lil Blue Boo:

One day when I get time maybe I’ll look through my old shipping data to see what I need to fill in. For now it gave me some new goals: New Mexico, South Dakota, South America, Italy etc. Most importantly, I’m finally learning my geography again.

New Things for Boo

I’ve talked about this before….how Boo rarely gets store-bought items….well I’m giving in a little. I’m not a shopper, I just don’t have time for it….so when I do buy new things it’s kind of newsworthy! Here are a few of my new favorite things:

Dresses by Mary at Green Goat:
Hand dyed using low impact dyes that are better for the environment, and then screen printed using non-toxic inks. Gorgeous! Perfect for our hot desert heat. A green owl……


…..and the purple hummingbird and wildflowers:


Hand-painted shoes by Jane from Snanimals:


Boo picked out the yellow dragonfly shoes….they are a size too big but she insisted on wearing them yesterday. We also have 2 green pairs featuring a Japanese doll. I love that she can put them on by herself.


Handmade doll clothes by Mel at The Melamoose Co
These are so tiny and perfect! They go in seconds so you have to keep track of uploads through her Facebook page.

Ok…I’m done shopping for a while. Back to work :)

The Thrift Store

I love taking an entire morning to hit the local thrift stores. Sorting through the racks of color-coordinated clothes is the ultimate hunt for treasure:

Photobucket
After I’ve pillaged the clothing section, I spend time browsing the other parts of the store. This entire rack was dedicated to ziplock bags of unfinished projects….I felt right at home:

Photobucket
Every thrift store has a large power cord section….I should remember this the next time I lose my phone charger:

Photobucket
Some thrift stores are nicer than others:

Photobucket

Random rug art….this was once a great idea:

Photobucket
Wedding dresses (a few were ripped so badly I immediately thought: Bridezilla):

Photobucket
I always get a little sad in thrift stores…..like it’s the end of the road for some….

Photobucket
….kind of like a place where really old things go to die. Depressing, right?

Photobucket
I hit three thrift stores yesterday. Each one in a different part of town. I spend a lot of time observing the people shopping….but I never have the guts to ask to take their photo.

A young man whipping through the store in 3 seconds flat….obviously looking for some specific electronic.

An elderly farmer waiting in line to purchase a pair of dress pants, maybe for his grandaughter’s graduation?

A young woman browsing the 99 cent intimates rack.

It’s a scene from a John Steinbeck novel. A reminder of what’s discarded, unedited and real.

Wine Cork Mementos

I have no idea when or where this tradition started, but every time our group of friends enjoy dinner together at a restaurant…..


….everyone in attendance initials the wine corks, dates them and takes one home.


Now I have got an entire drawer full of dated wine corks…..each a reminder of a special occasion and a fun night with friends. I’m still pondering what to make with them ;)

Other uses for corks: itty, bitty stamps (see previous post)

Or maybe a cork card holder decorated using a cheese shaped stamp.

Licensed LBB Sellers Directory (and thoughts on licensing)

I love mixing up my daughter’s wardrobe with clothing from other upcyclers! Here is a pirate dress from Olivia’s Ultimate (Boo was pretending she was looking through a spyglass at some construction workers at school):


Remember the ugly knit swap I did with a few other upcyclers? Here is what I sent Melissa from Nookie Scooter:


She turned it into this adorable dress……we love it!!!


Both Olivia and Melissa used the Sienna Dress Pattern to make their dresses with their own unique additions. Below is a directory of other online stores who sell dresses from Lil Blue Boo patterns. Check them all out (they are listed alphabetically)! (if I forgot anyone or mixed up any links PLEASE let me know right away!)

Abby Rose Creations
Alli Cat Creations
An Apple and a Tree
Baby Fish Designs
Chimi and Changa
Ella Faith Designs
Glittering Goldfish
Katie Jane Clothing
Katy’s Kreations
Kara Jes Designs
Lilith’s Laundry
Lovebird Tees
MissyMoo Boutique
MooBeeTees
Nookie Scooter
Olivia’s Ultimate
Posh Chic Couture
Pretty Industries
See Sam
Sew Fun Fabrics
Sewing for Sadie
Shivika
Soren Lorenson Design
Sweetie Bird Fashions
Teetertotter Tot
The Flossy Fitzy
The Kestlyn Collection

Three Little Birds Stitch Co
Whimsical Dragonfly

On Licensing:

I get lots of questions on licensing so I thought I’d try to quickly explain my thoughts without filling up the whole page:

Basically, all pattern makers have their own rules for using their patterns, but typically when you buy a pattern you are purchasing a “license” to make one item. If you wanted to sell items you were making from a pattern, you would technically have to buy one pattern per item you sell. By offering a production license, pattern makers are able to offer a more economical way for someone to make and sell items.

There is lots of debate out there about pattern copyrights and what is legal and illegal. Here’s my 2 cents:

1. When in doubt about using a pattern to resell items: ASK the pattern maker! For me it really isn’t an issue of law, it’s about the policy laid out by the person who published that pattern. When you buy a pattern from someone you are agreeing to those terms.

2. By offering licenses, I am able to keep my pattern prices low and also allow small sellers to earn some extra money sewing from their own home. Hours and hours and hours go into creating a pattern and small-time pattern makers such as myself provide hours of extra service answering questions and offering guidance to those who have purchased patterns. It’s prudent business to build in a small compensation for that time and effort.

3. As a pattern maker it’s my job to make a clothing item easy, functional and affordable to sew….not to create a style per se. I don’t have a right to anything someone sews that just happens to look like mine, but I do have a right to the technique in which someone creates that garment because I’ve developed my own method, sizing etc.

I’m not a lawyer so do your own research…..and just because someone “knows a lawyer” doesn’t mean they have a clue about the subject they are talking about ;) A good resource for all things fashion/business is Fashion Incubator.

Here are a few other links to other pattern makers who sell licenses as well….perhaps they explain it better!

Made by Rae
Oliver and S

Saturday LBB Gallery Share – "Found….one Godzilla"

Every Saturday morning around 7:30am….Boo and I go to Starbucks so Mr. LBB can sleep in. The same people are there every weekend and it’s fun to see familiar faces! She wore her LBB Father’s Day dress a little early because I am WAY behind on laundry:


This sign has been up since last weekend near the entrance….not sure why no one has claimed their Godzilla yet:

I received some photos of my new “Elephant Ear” style this week! My friend Lisa took this photo and a bunch of others at the famous Parker Hotel in Palm Springs. (Click here to see the rest of her photos!)


Photos from Michelle of Smackerals….the dress on the right is one of my favorites ever!


The sleeves are silk screened “mazes” that Boo and I did one weekend for a project:

Boo in a LBB horse racerback….it got HOT this week…110 degrees one day!


Oh, and when Boo isn’t wearing something I made…..she wears Dress Me. Liesbeth makes the cutest clothes! Here is Boo’s new dress….all the way from the Netherlands!


Hope you are having a great weekend!!!

Related Posts Plugin for WordPress, Blogger...