
Here is my easy tutorial for adding reverse applique to clothing. I am using my daughter’s pink pirate tank top as an example. I started with the below tank top and skort set that I bought at Target for around $8.

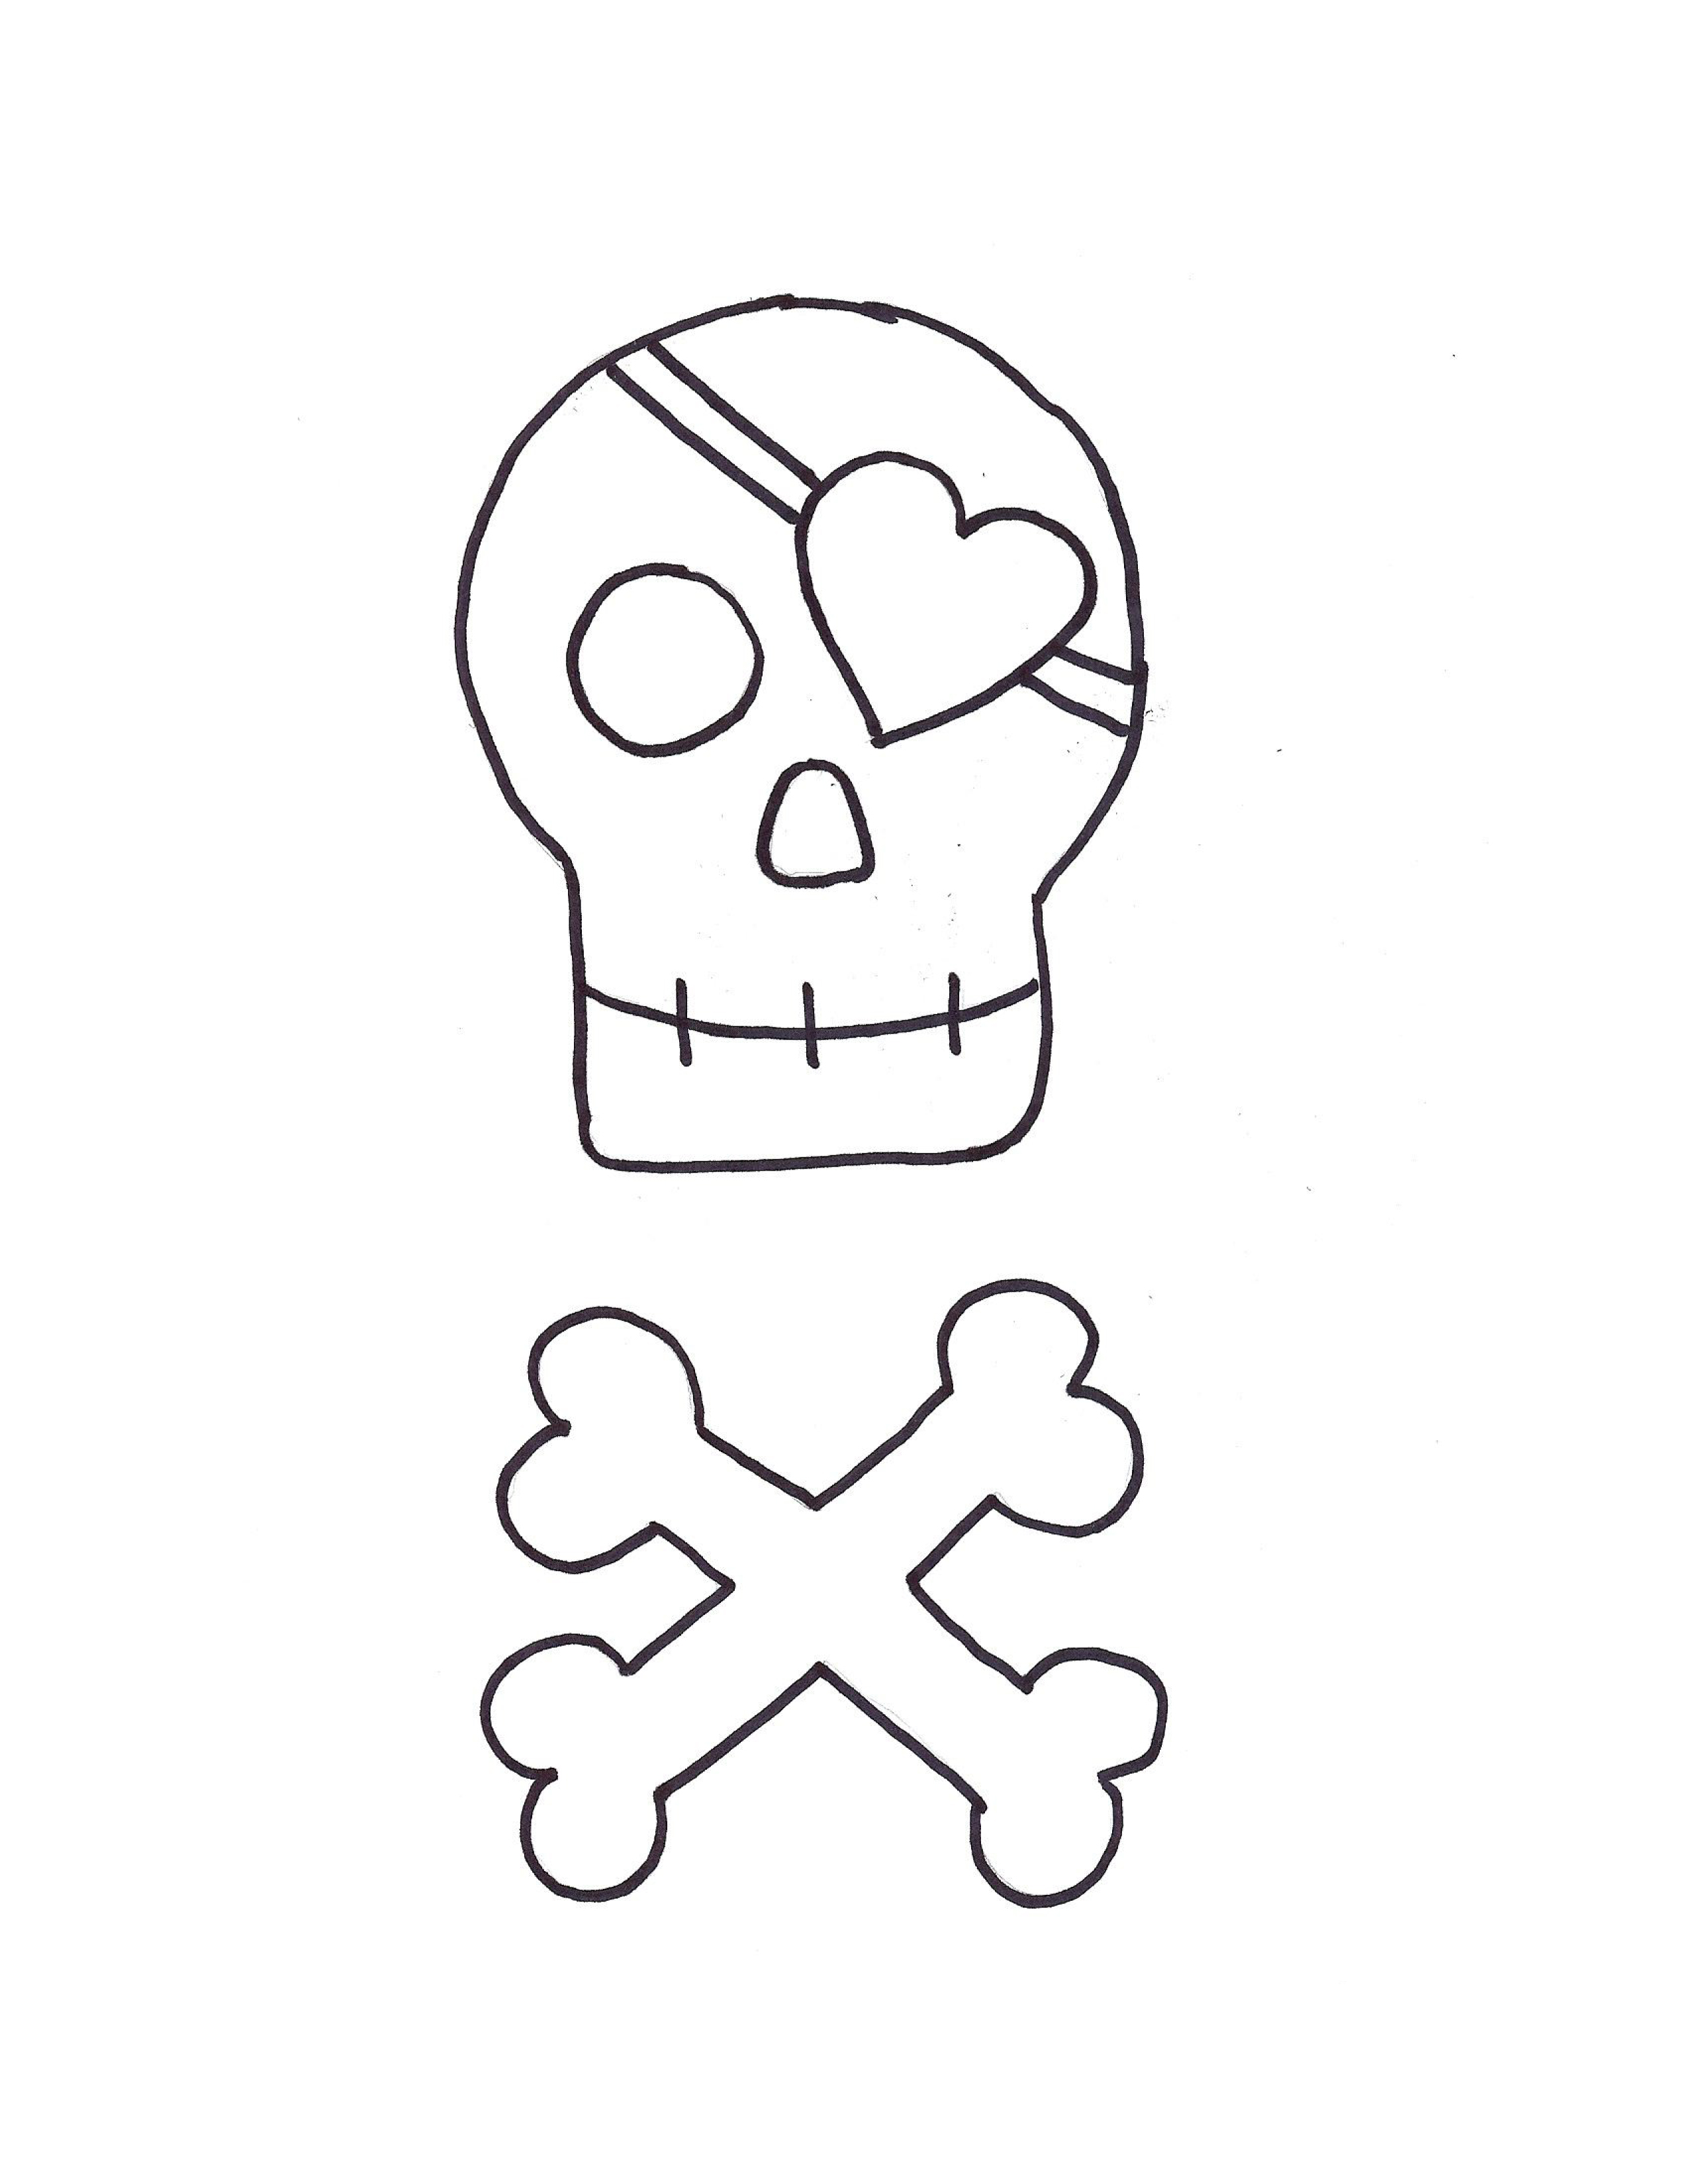
First, I sketched out a design. Tip: If you aren’t a skilled freehand artist there is an easy way to come up with a unique drawing. Take items with similar shapes to what you are looking to design and use them as your drawing guide. I used a roll of tape and an candy tin to design the skull:


You can download my template for the pirate skull and crossbones below:
*Copyright © 2009 by Ashley Hackshaw. All rights reserved. This applique is for personal and home use only. A limited commercial license may be purchased for limited production. Please email me at ashley (at) dc.rr.com for more information. Thank you for respecting my copyright!
Next, you will need fabric for your applique. To make my fabric easier to sew I first stabilize it by ironing a piece of lightweight fusible interfacing (Pellon brand) to the wrong side of the fabric.

Then I drew my design on the wrong side of the fabric using a disappearing ink pen (you will actually be drawing on the fusible interfacing you just ironed on).

I cut out the skull leaving about 1/4″ border. I turned the tank top inside out and pinned the skull to the shirt. The right side of the skull fabric is against the wrong side of the tank top.

I sewed the outside line of the skull first. I sewed all the way around it twice.

Next, I moved to the inside shapes and sewed all the way around each twice. Each shape is sewn separately (i.e. I am lifting up the machine foot and moving to each shape so that they are not connected by a sewn line).

Below you can see my entire design has been sewn onto the tank top. I am an impatient seamstress so my stitching starts to look a little messy but since I am sewing every line twice I almost prefer it that way so that it looks intentional.

Turning the tank top right side out again this is what it looked like:

This is my favorite step of reverse applique: I took my small detail scissors and cut out the portions of the tank top where I want the fabric below to show through. I left about 1/8″ border outside of the stitching where I cut.

Here is the finished cutout.

Tip: I like to take a tiny paint brush and apply a small amount of Dritz Fray Check around the 1/8″ border of left to keep it from unraveling too much in the wash. It just reassures me that my applique is going to stay put.

To complete the outfit, I added a matching crossbones to the skort. I cut a small felt pink bow and hand-stitched a border with black dmc thread. I attached it using Dritz Stitch Witchery to the side of the skull to make sure everyone knows it is a “girl” pirate skull! For the last step I added a few rhinestones to the skull teeth and around the crossbones. I used Tulip iron-on glass crystals because they glue directly to the fabric and nothing is inside the shirt to make it itchy. You can find them at most craft stores.

GENIUS!!! Now if I could just find the time to try this!!
LOVE YOU!!! I just found this and am in Heaven. My almost 6 year old has been talking about the “Pink Pirate” party she wants for a good 3 months already! Can’t wait to make this for her.
another cute one!
I had heard the term reverse applique', but had never tried it before. Great tutorial!
I just tried to download your cool pirate applique, but it said I needed a password!
Is is "open sesame"?! Lol!
I got it – thank you! Serenity loves pirates so I know she's gonna to get all excited when I make this for her!!
What an excellent reverse applique tutorial! I just whipped out two adorable (if I do say so myself) pillow cases with no problem. Thanks for sharing!
Thank you!!! I never knew such technique exist..well, i didn't sew much 😀 thanks you so much again for the tutorial, definitely will try this soon :)))
I featured this tutorial today on my blog! I would love if you stopped by to check it out! Todaystoptwenty.blogspot.com
P.S. I think you are a.maz.ing!
Amanda
Such a great tutorial.